| Return shipping will be paid by | Seller |
|---|---|
| All returns accepted | Returns Accepted |
| Item must be returned within | 30 Days |
| Refund will be given as | Money back or replacement (buyer's choice) |
| Modified Item | No |
| MPN | Model# 001 |
| Country/Region of Manufacture | United States |
| Custom Bundle | No |
| Brand | Dorn Products |
| Material | Aluminium |
| Non-Domestic Product | No |
| Type | Tile Leveling System |
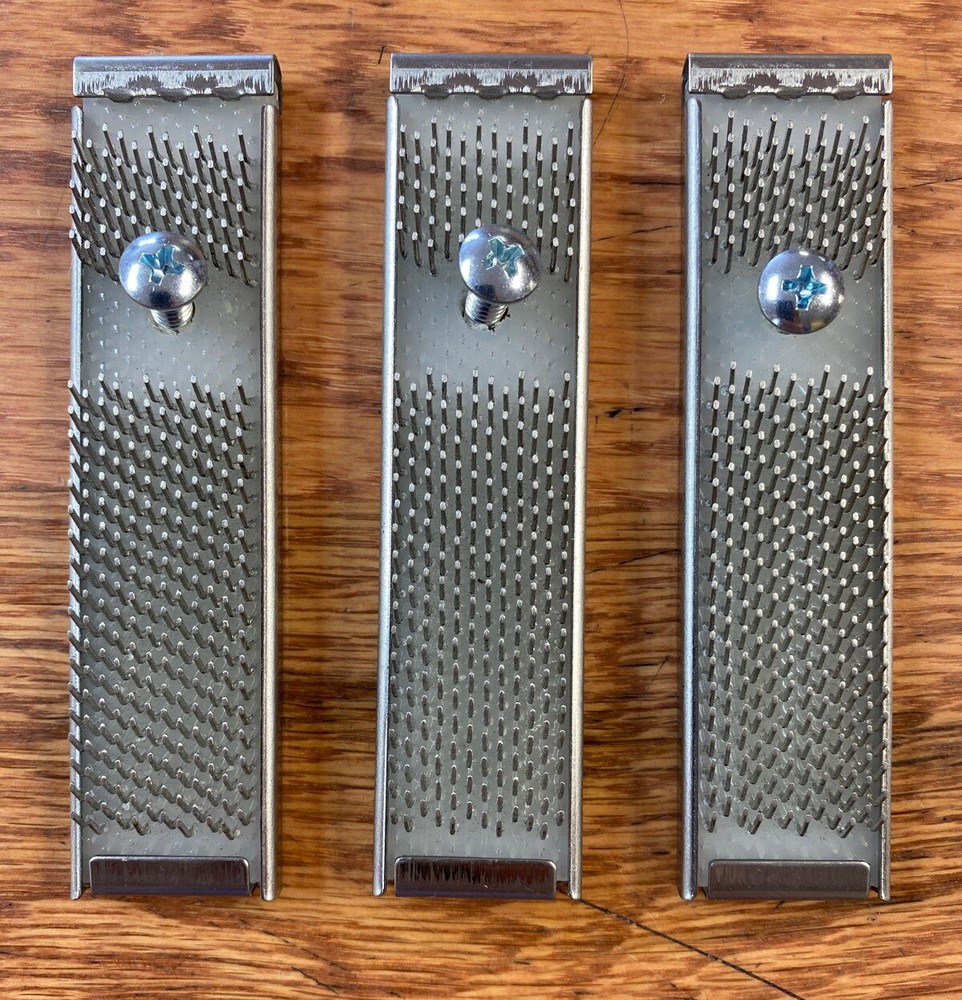
Check the listing for details. Tile Lippage Leveling System ... Kit Contains 3 levels and 1 case. Condition: New. Listed at 29.95 USD. Tile lippage Level Model #001 by Dorn Products Made In USA_ Kit includes 3 levels and 1 storage case Sturdy aluminum construction High quality easy to read bubble level Hardened chrome spherical contact points Padded storage case keeps tool safe and handy when not being used What are the Advantages? Saves money when compared to conventional T-style lippage systems Bubble level indicates mismatch between tile edges Eliminates need to rub hand or straight edge over tile Keeps your fingers and tile clean Less clean-up Contact points create smooth bubble movement Raised body stays off the tile for smooth contamination free operation Very accurate measurement makes laying tile like a pro easy Will work with all tile laying patterns Will work with smooth to lightly textured floor tile Will work with all thicknesses of tile even natural stone tile of varying thickness laid side by side One set of three levels is all you need to lay any size room Can be used again and again and again.... No need to remove wedges or break off plastic parts before you grout No extra tools required to use this system The only tool you need to level all size tiles from 2"x2" accent to 48"x48" and bigger slabs Can be used in conjunction with other T-style leveling systems to verify results How doThey Work? One word "excellent" Level is placed over grout joint of adjacent tiles The tile being set is worked down until bubble in the level is centered in the lines Step by Step Instructions1. Set one tile in position level in both directions using 2 levels set in perpendicular directions2. Place a tile adjacent to previous tile do not push into thin set 3. Place 2 Tile Lippage Levels on adjacent edges as far apart as possible4. Place third level on tile, reading direction away from set tile5. Work tile into thin set until all Tile Lippage Levels read level6. Continue this direction repeating steps 2-57. Place a tile in the next row (90 degrees to first row)8. Repeat steps 3-59. Place next tile in corner of set tiles do not push into thin set10. Place 3 Tile Lippage Levels on 3 corners of tile being set and adjacent tiles spanning grout joint11. Work tile into thin set until all Tile Lippage Levels read Level12. Repeat steps 9-11 With slight variations this method will work with all patterns levels will indicate variations as little as the thickness of a piece of paper Under normal laying practices if bubble is ¾ within lines it is acceptable See pictures of product for illustrated instructions Tile lippage Level Model #001 by Dorn Products Proudly made in the USA Please visit website to check this product out and others to be released
You may also like