| Return shipping will be paid by | Buyer |
|---|---|
| All returns accepted | Returns Accepted |
| Item must be returned within | 14 Days |
| Refund will be given as | Money Back |
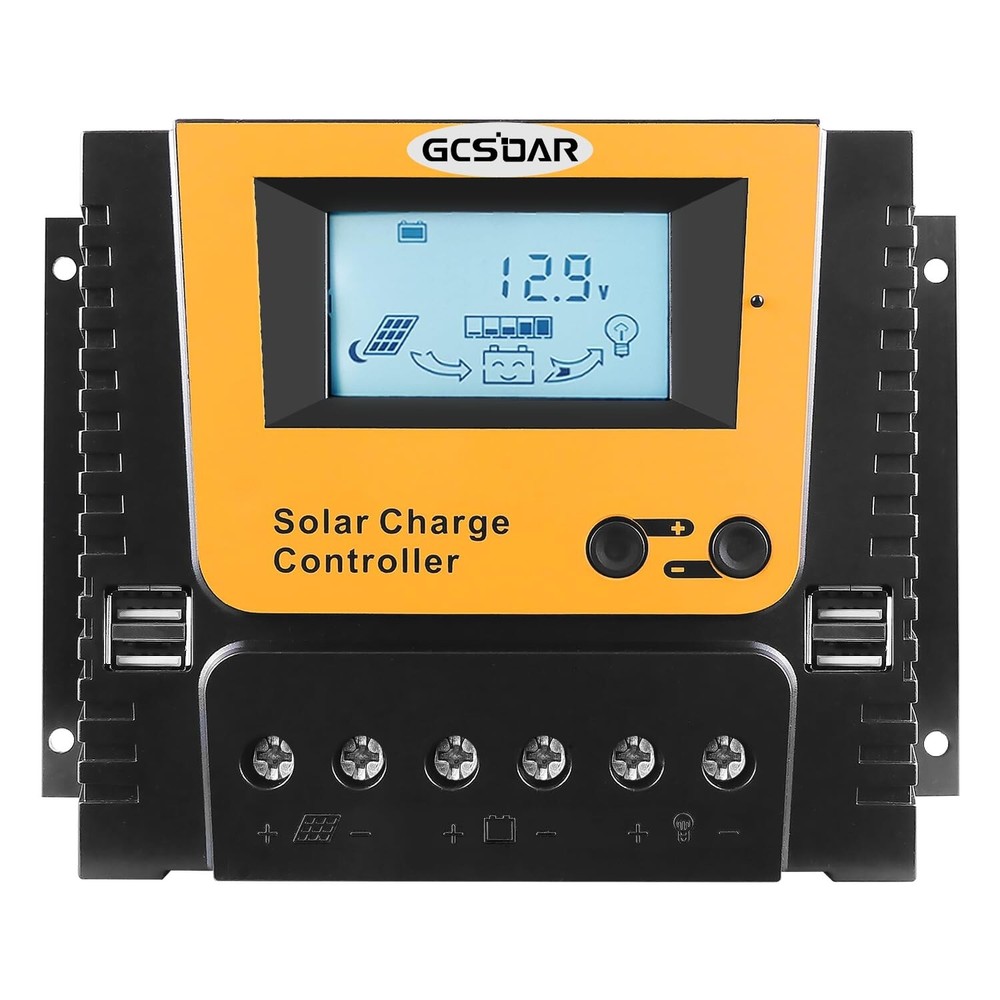
| Brand | GCSOAR |
| Current Output | 60A |
| Type | Charger/Inverter |
| Current Type | DC |
| System Configuration | Off-Grid |
| Power Source | Solar |
| Size | 7.87in *5.18in *2.83in |
| Voltage | 12V/24V/36V/48V |
| Charging Mode | PWM (Pulse Width Modulation) |
| Country/Region of Manufacture | China |
| Power | 720W-12V BAT;1440W-24V BAT;2160W-36V BAT;2880W-48V BAT |
Check the listing for details. Solar Charge Controller 60A, 12V/24V/36V/48V Auto Max PV 100V.. Condition: New. Listed at 45.99 USD. PWM charge controller 60A,12V/780W, 24V/1560W,36V/2340W/,48V/3120W Max.PV 100V (support lead-acid and lithium batteries), common negative pole. Product Specification : Model: VT6048: 60A Max. PV input power: 780W/12V for battery system, 1560W/24V for battery system,2340W/36V for battery system,3120W/48V for battery system. Max.PV open circuit voltage: 100VDCRated charge current :60 AmpRated discharge current :30 AmpNominal system voltage:12V/24V/36V/48V DC auto ( Lithium voltage can’t be identied auto, please select controller BAT Li-type by manual. )Max. PV open circuit voltage: 50V @12V/24V BAT system(at minimum operating environment temperature) , 46V(at 25℃ environment temperature) Max. PV open circuit voltage:100V @36V/48V BAT system(at minimum operating environment temperature) , 92V(at 25℃ environment temperature) Support Battery types : Sealed(default) ,Gel (AGM), Flooded, User ; LiFePO4(3.2V)~ (4s/5s@12V; 8s/10s@24V; 12s/15s@36V; 16s/20s@48V ); Li (NiCoMn)O2 (3.7V)~(3s/4s@12V; 6s/8s@24V ;9s/12s@36V; 12s/16s@48V), User . Package: PWM Controller 60A X1Manual(English) X1 Steps: Connect solar system in this order: 1.battery--> 2. PV arrayload--> 3.DC load, and disconnect solar system in the reverse order >3. >2. >1. Battery must be connected first ! Never connect soalr panel array to controller Without/Before connect battery. DO NOT connect any inverter/wind/Alternator or Charger into the charge controller directly ! You should connect with battery and add fuse .The fuse should be installed as close to battery as possible,the suggested distance is about 150mm Controller‘s Button Operation Instructions Interface browsing: Press "+" or "-" to browse different parameters. Turn ON/OFF Load: Set the load to 24H working mode frist, then on the main interface press "-" to TURN ON/OFF the load terminal's output. Parameter setting modification: press and hold "+" on the settable interface to enter the parameter setting, then press "+" or "-" to adjust the parameter value, and finally press and hold "+" to confirm and save the parameter setting. (press and hold "-" means: do not save the parameters and restore the last parameter settings) Restore factory settings: press and hold "+" on the ambient temperature interface to restore factory settings. Under the interface of Accumulated KWH, press and hold “+” button can clear the value; When no operation 30s, the interface will be back to main interface, and back-light will be turned off. PWM Solar charge controller-60amp Battery voltage range: 8~68V Grounding : Common positive grounding Temperature Compensation: -4mV/℃/2V (25℃) Work environment temperature : -20℃~+50℃ Protection Category: IP30 USB Output: 5V/2A LCD backlight time : 30S (Default) Controller Terminals: #4AWG(25mm²) Mounting hole size: 190*104mm~Φ5mm Dimension: 200*131.6*61mm ; weight : 0.8 KG
You may also like